Anthro

Monday, May 4, 2015

Fireplace Makeover with Tin Tile


Let's just cut to chase and start with the before of my fireplace.
The pros of this fireplace are the large size, lack of brass, and nice wood details.  It's the oak and the tile that I just don't love.  I am probably perfectly capable of ripping out the old tile and I seriously considered a fun herringbone patterned tile to take the current's place.  I just couldn't bring myself to do it because...I was afraid I'd hate it in 10 more years.  I just love an old fireplace look, something timeless.  I love the herringbone tile look that is so popular right now, but will it scream "2015" a decade from now?  Because one thing is for sure: I'm not tiling this fireplace twice.

The new plan: tin tile glued right onto the old.  Next challenge: making everything heat resistant. 
The first step was to eliminate the oak.  I deglossed the wood with Kleanstrip Sander Deglosser and then primed with Zinnser Bullseye.  I painted with several coats of white paint and followed that up with three or four coats of Varathane Polyurethane.  I did quite a bit of research on the poly to use and decided on Varathane for what I hope to be it's resistance to yellowing as a result of high heat.

The tile was up next.  I started by buying nail-up 12" square tin tiles from metalceilingexpress.com.  They were one of the few vendors I found that carried the 12" size I needed.  I ordered the tile without paint and then used high heat grill paint from Home Depot and added a finish on top using a clear gloss enamel engine paint from O-Reilly Auto

Next, I "glued" up the tiles using Rutland High Heat Silicone from Amazon.  After reading all of the reviews I felt confident it would hold as needed.  I applied generously to the tile and then placed around the fire box right on top of the existing tiles.
Because this is a silicone the tiles would slip and slide on the vertical surface.  As a result. I braced the tiles using scrap wood.  I left the wood in place for at least 8 hours to ensure the silicone had a chance to really set up.  As you can see below, the tile did not completely fill the space on the sides and top and I made a plan for adding trim.  But first, I needed to make a decision about the tile on the floor before I could place the final pieces of tin tile against it.  


I debated painting the tile but was afraid of scratches.  I debated just painting the grout to update the look but I finally decided to do the project fully and bought this lovely limestone tile at Home Depot.
I ripped out the old tile and put in the new. 
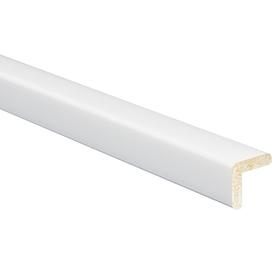
Now, I can finally finish off the tin tile!  I added narrow oak strips on the sides and dentil molding along the top.  The finishing touch: caulk...lots of it!  It filled in all the nooks and crannies that I simply couldn't get to.  After a light coat of the spray paint and enamel on top of the caulk my project was done.


Total cost:
Tin Tile: $60
Limestone Tile: $50
Paint, Silicone, etc.: $25

Total cost of updated fireplace: $135

One last before and after:


Thursday, February 26, 2015

DIY Rustic Crate


Not only do I love storage, I need it.  My family accumulates a lot of stuff and they get that stuff out a lot.  My hubby would love it if his stuff could permanently live on the end table.  Why do I feel the need to put away remotes and notebooks and computer monitors if he's just going to get it out again later tonight?  Solution: easily accessible crates.  

I bought two crates like the above bare wood crate.  I bought the first a few months ago at Home Depot.  When I finally got around to getting a second for my project, they were no where to be found at Home Depot.  No problem, I went to Michaels armed with a 40% coupon and bought a second.  I found that while staining, the Michaels crate had a much rougher finish on the interior and next time I will run a sander over it before getting started.

My first step was to stain the crate inside and out with Minwax Dark Walnut.


I let that sit for a while, mostly because I had no idea what my next step would be.  I finally figured out a plan and purchased two colors of sample paint.  I used Valspar's Green Shimmer for the first coat.  I dry brushed it on.  If you've never dry brushed, you basically need to wipe the excess paint off of your brush before you paint with it.

After coating the entire crate, I recoated again with Valspar's Mermaid Tail.  In hindsight, these colors were very similar and I maybe should have gone for a little more contrast...live and learn.  You can see the second color on the left.


Here it is completely covered with both colors.


The next step was sand it down with 80 grit sandpaper using my vibrating sander.


I then applied the stain again over the paint.  I made sure to apply stain everywhere as it really took away the "fresh paint" look.  After applying, I wiped away any excess stain.

I bought this leather belt for $3 at Goodwill the other day with this project in mind but it was still too shiny.

My first thought was to paint it with the paint I used on the crate...
it wasn't my favorite so I tried white...
and then wiped off the excess with my stain rag.

The last step was to attach it over the open handle using a couple of screws.


I'm debating putting casters on the bottom box to make it easier for my girls to access their toys.  I'm loving how they turned out and I love how practical they will be for my family!


Tuesday, February 17, 2015

Lazy Susan Bookcase - Ikea hack


I spotted this Pottery Barn bookcase (for $699) and knew it would be great for my growing-up-way-too-fast "little" girl.  I was not, however, a fan of the price tag and knew it was an Ikea-hack waiting to happen!

Display-It Storage Mirror

Here's what I purchased to make it happen:

An Ikea Billy Bookcase in white ($39.99)
BILLY Bookcase IKEA Narrow shelves help you use small wall spaces effectively by accommodating small items in a minimum of space.

A 24" pine round from Lowes ($17.50)
 Stain Kiln-Dried Elliotis Pine Round (Common: 1-1/4-in x 24-in x 24-in; Actual: 1-in x 24-in x 24-in)
A couple pieces of corner trim from Lowes ($10.74)
 0.937-in x 0.937-in x 8-ft White Polystyrene Outside Corner Moulding
A lazy susan from WoodCraft ($5.99)

And a beveled mirror from Wal-Mart ($14.97)
Mainstays Beveled Door Mirror
Grand total of $89.19 for the essentials!  That's about 13% of the Pottery Barn cost!
Admittedly, I spent another $40 on the cute little items I glued on the side of the bookcase and had some extra trim pieces and paint on hand.  Still not a bad discount on the retail price!

Here's the how-to!
First thing we did was assemble the bookcase.  I left the Ikea directions in the hands of my six year old.  She took great pride in building the bookcase.
Good thing she was in charge because I'm sure I wasn't going to fit in that space to put that part together.

I do like to live dangerously.  My thumb likes my dangerous living less so.

 We finished assembly and realized the back of the bookcase was not so pretty.  Yuck, ugly plain cardboard back and exposed particle board edges.  First things, first.  We painted the cardboard back to match her room.

Here are the next problems: 1) my bookcase needs a bottom for attaching the lazy susan and 2) I didn't want to see this gap at the bottom of the bookcase back.

I solved the problem of no bottom by cutting some 2x4s to fit in the gap and them attaching a piece of spare particle board to the 2x4s.  The 2x4's are held in by using my nail gun and nailing through the bottom shelf of the bookcase.  The particle board is then attached to the 2x4s with glue and nails.  I also added a board across the back bottom as a support for a piece of trim that will cover the hole.


Next I added some painted corner molding to the edges and top of the bookcase to cover the exposed edge of the particle board.  I also attached a 6" wide piece of trim beneath the mirror in order to cover the gap that I mentioned earlier.  I cut it to fit between the corner molding pieces.  The support I added in the previous step gave it something to attach to.  You can see the 6" trim piece in the finished pictures at the end.  I used the nail gun to attach the trim pieces and then filled in the holes with some spackling before giving them another coat of white paint.

The final step was attaching the lazy susan to the pine base and the bookcase bottom.  I started by priming and painting the wood base.  Center the lazy susan on the base and mark where you will insert your screws for attaching the lazy susan to the base.  You'll notice that the lazy susan also has four large holes.   You also need to mark these holes on the base and drill a hole in the wood equal in size to the hole in the lazy susan.  You will use these large holes as a way to access the part of the lazy susan that needs to be attached to the bookcase. Essentially, you will put your screw and screw driver into the large hole you drilled in the base from the underneath side and attach the screw.  As an added tip, it's a good idea to drill (very small) pilot holes for all of your screws.  Do this on the base AND the bookcase before you attach the lazy susan to either piece.  It will make your life MUCH easier.

As you can see I added some vinyl lettering above and below the mirror.  I put the phrase "You are loved." at the top and "BeYoutiful" on the bottom.  The mirror was attached using a special mirror adhesive by Liquid Nails.

I added some Hobby Lobby finds on each side.  This side has a magnetic "white" board and a little fox with hooks for hanging some of her jewelry.  I attached both items using the "projects" type of liquid nails.

This side has a little framed A, a birdcage chalk board, and a clipboard for hanging one of her works of art (of which there are MANY).  Again, I attached these using liquid nails.

The shelving was put to good use very quickly.  It's nice that the shelving is the same size as many of the cube storage containers sold at Target.  We inserted one of those on the bottom shelf to hold some small stuffed animals.  If you wanted a less cluttered look, you could use cubes on every shelf.


I am sure another one will be built in the future for the little sister.  As a warning, because the bookcase is very tall and is not anchored to the wall I would not suggest it for use in the room of a furniture climber.  The little sister will get one eventually but not until I'm sure she has passed any chance of a climbing stage!

I hope you love it as much as we do.